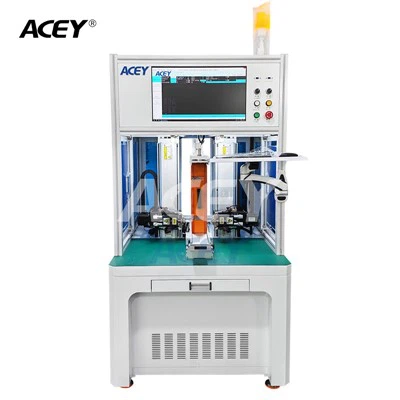
Hey there! As a supplier of CCD Testers, I often get asked about how to connect a CCD Tester to a computer. It might seem a bit daunting at first, but it's actually a straightforward process if you follow the right steps. In this blog, I'll walk you through the whole thing, from the equipment you'll need to the final connection.
What You'll Need
First off, let's talk about what you're going to need for this connection. Obviously, you'll need a CCD Tester. We offer a wide range of CCD Testing Machine that are designed to meet different needs. Whether you're doing simple visual inspections or more complex testing, we've got you covered.
You'll also need a computer. It doesn't have to be a super high - end one, but it should meet the basic requirements of the CCD Tester software. Usually, a computer with a decent processor, enough RAM (at least 4GB), and a modern operating system like Windows 10 or later will work just fine.
In addition to the CCD Tester and the computer, you'll need a connection cable. The type of cable depends on the interfaces available on the CCD Tester and the computer. Common types include USB cables, Ethernet cables, or even serial cables in some older models. Make sure you have the right cable for your specific setup.
Checking the Interfaces
Before you start connecting anything, it's important to check the interfaces on both the CCD Tester and the computer. Most modern CCD Testers come with a variety of interfaces, such as USB 3.0, Gigabit Ethernet, or FireWire. On the computer side, you'll want to make sure it has the corresponding ports.
If your CCD Tester has a USB interface and your computer has a USB port, that's great. Just make sure the USB port is working properly. You can test it by plugging in another USB device, like a flash drive, to see if it's recognized.
If you're using an Ethernet connection, check the network settings on your computer. Make sure the network adapter is enabled and configured correctly. You may need to set a static IP address for the CCD Tester and the computer to communicate properly.
Installing the Software
Once you've checked the interfaces, the next step is to install the software for the CCD Tester. This software is crucial as it allows the computer to communicate with the CCD Tester and control its functions.
You can usually find the software on the CD that comes with the CCD Tester or download it from the manufacturer's website. Follow the installation instructions carefully. In most cases, you'll just need to run the setup file and follow the on - screen prompts.
During the installation process, the software may ask you to connect the CCD Tester to the computer. Don't do this just yet. Wait until the software installation is complete. After the installation is finished, you can then connect the CCD Tester to the computer using the appropriate cable.
Making the Connection
Now it's time to make the actual connection. If you're using a USB cable, simply plug one end of the cable into the USB port on the CCD Tester and the other end into the USB port on the computer. The computer should automatically detect the new device and install the necessary drivers.
If you're using an Ethernet cable, connect one end to the Ethernet port on the CCD Tester and the other end to the Ethernet port on the computer. You may need to configure the network settings on both the CCD Tester and the computer to establish a connection. This may involve setting the IP address, subnet mask, and gateway.
Once the connection is made, open the CCD Tester software on the computer. The software should recognize the CCD Tester and display its status. If it doesn't, there may be an issue with the connection or the drivers. Check the cable connections and make sure the drivers are installed correctly.
Configuring the Settings
After the CCD Tester is recognized by the software, you'll need to configure the settings. This includes things like the resolution, frame rate, exposure time, and gain. These settings can have a big impact on the quality of the images or data captured by the CCD Tester.
The software usually provides a user - friendly interface where you can adjust these settings. You can experiment with different settings to find the ones that work best for your specific application. For example, if you're doing high - speed inspections, you may want to increase the frame rate. If the lighting conditions are poor, you may need to adjust the exposure time or gain.
Testing the Connection
Once you've configured the settings, it's time to test the connection. Use the CCD Tester to capture some images or data and see if they are displayed correctly on the computer. You can also try performing some basic functions, such as zooming in and out, panning, or taking a snapshot.
If everything is working properly, you should be able to see clear and accurate images or data on the computer screen. If you encounter any issues, such as blurry images, incorrect data, or connection problems, double - check the settings and the cable connections. You may also want to refer to the user manual or contact the technical support team for assistance.
Troubleshooting Tips
Even if you follow all the steps correctly, you may still encounter some problems. Here are some common issues and their solutions:
- Device not recognized: If the computer doesn't recognize the CCD Tester, check the cable connections. Make sure the cable is plugged in securely and that it's the right type. You can also try restarting the computer and the CCD Tester.
- Driver issues: If the drivers are not installed correctly, the CCD Tester may not work properly. You can try uninstalling and reinstalling the drivers. You can also check the manufacturer's website for updated drivers.
- Network connection problems: If you're using an Ethernet connection and there are network issues, check the network settings on both the CCD Tester and the computer. Make sure the IP addresses are configured correctly and that there are no firewall or security restrictions blocking the connection.
Conclusion
Connecting a CCD Tester to a computer is not as difficult as it may seem. By following the steps outlined in this blog, you should be able to establish a successful connection and start using the CCD Tester for your inspections or testing.
If you're in the market for a high - quality CCD Tester, we've got a great selection of CCD Visual Inspection Equipment and Cylindrical Cell Poles Visual Inspection Machine. Our products are reliable, easy to use, and come with excellent technical support.
If you have any questions or need more information about our CCD Testers or the connection process, don't hesitate to reach out. We're here to help you with your purchasing decision and ensure that you get the most out of your CCD Tester.


References
- Manufacturer's user manual for CCD Tester
- Online resources on CCD Tester technology and connection methods